


REPLACE CREATION PICTURES ON THE SIMS 4 GALLERY ! You would like to replace the pictures of your creation shared on The Sims 4 Gallery ? Here is how to do it !
First, you’ll need Deevo’s wonderful tool : the Sims 4 Tray Importer

To change the pictures of your creations on the Gallery, you’ll need the Sims 4 Tray Importer tool (version 1.3.4 and above). This software was made by Deevo, an Administrator of our french website l’Universims.
Follow the instructions to install the tool.
Compatible with Windows XP / Vista / 7 / 8.x / 10
Available in French, German, English and Chinese.
Thanx to Fezet for writing this Tutorial ! 
Step 1 : Save your creation in the Library
First, your creation need to be saved in your in-game Library.

To save a lot or a room, in Build Mode, click on the folder icon in the top menu and follow the instructions.

To save a Sim or a household, in Create-a-Sim, click on the folder icon in the top-right menu and follow the instructions. Once it’s done, close the game and go to the next step.

Step 2 : Find the number of editable pictures
Then, you have to find the number of pictures you can replace for your creation.
- Open the Sims 4 Tray Importer
- Click on your creation (on the left)
- In the Files tab, count the number of pictures
If your creation is a lot, then the files are the BPI files, otherwise they are HHI (households), SGI (Sim) ou RMI (room).
Among these pictures, one is existing in two sizes : a large and a small size, it’s the main picture of your creation.
So if there are 4 files, your creation has only 3 different pictures.
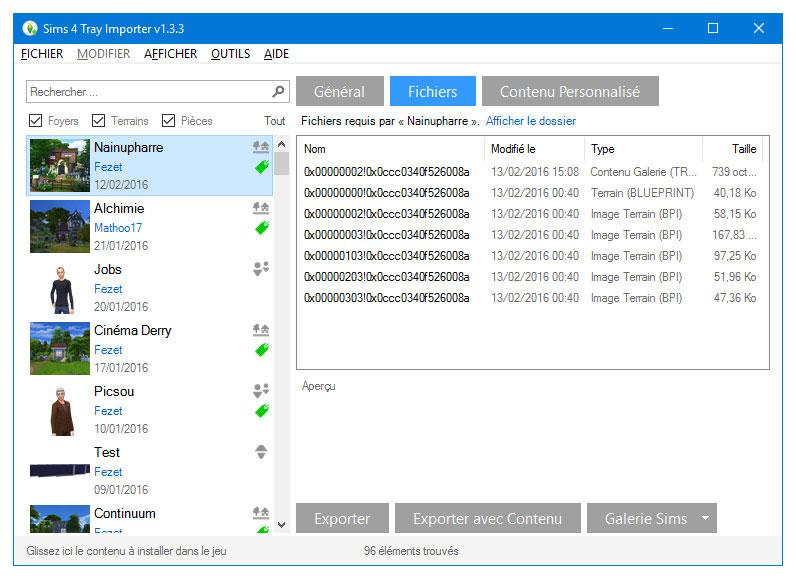
This lot has 5 BPI files, so it has in fact 4 different pictures. Then, you have to create the replacement pictures for your creation that will appear on the Gallery.
STEP 3 : Prepare your pictures !
Next, you have to choose and prepare your pictures. To do that, just press the C key in game to take a screenshot.
In-game screenshots are saved in the following folder : Documents / Electronic Arts / The Sims 4 / Screenshots.
Besides, don’t hesitate to read this other tutorial made by Fezet :
The Sims 4 Tutorial : Taking beautiful pictures in game – Graphics settings, TAB Mode et Tips (in french).
In this step, you’ll prepare your pictures. To do that, you’ll need a photo editing software like Paint.NET or GIMP (free) or Photoshop (not free…)..
In any case, remember that if your creation has 4 image files, you can only have 3 different images.
Don’t worry about resizing : The Sims 4 Tray Importer does it automatically !
MAIN PICTURE (thumbnail)
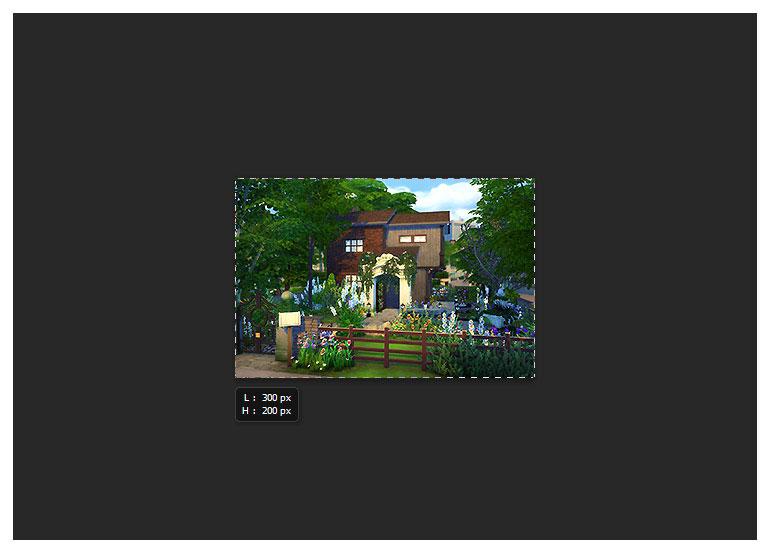
This is the picture you see when your creation is displayed in search results on the Gallery. This is the same picture than the large presentation picture.
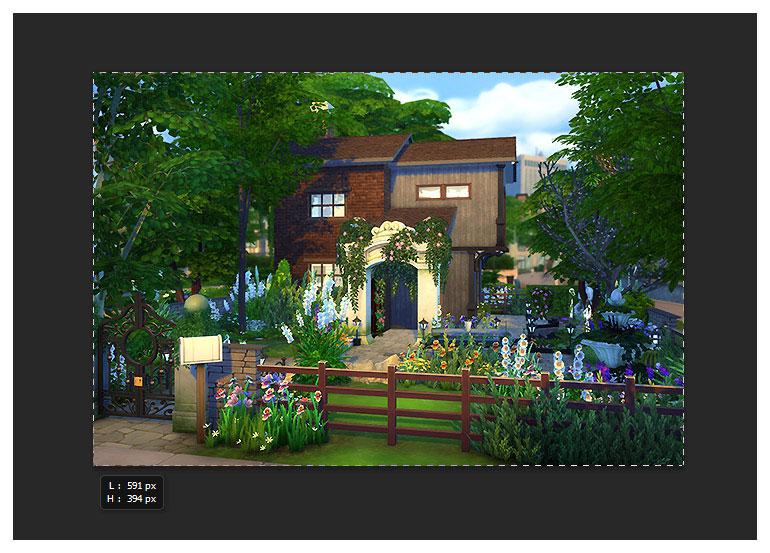
OTHER PICTURES
These are all the others pictures of your creation. Among them, there is the larger version of your creation’s main picture. Your pictures are ready !
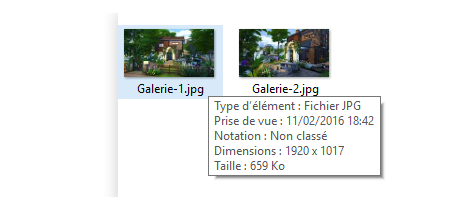
Remember to name them to be able to find which you’ll need to choose for the next step.
For the example, I saved 2 pictures : 1 main picture (which will be used to make thumbnail and the large presentation picture) and one other.
STEP 4 : Replace the pictures
We’re almost done : now just open the Tray Importer, select your creation, and replace the pictures !
- Click on your creation on the left menu
- Go to the Files tab
- Right-click on any picture and choose Replace.
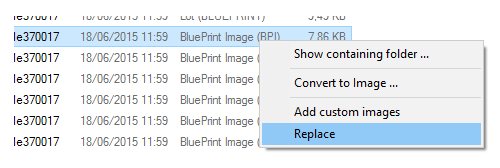
- Now, for each picture you want to change, click on Remplace. Find and select the previous pictures you have saved.
- Once it’s done, click on Apply. It’s all over !
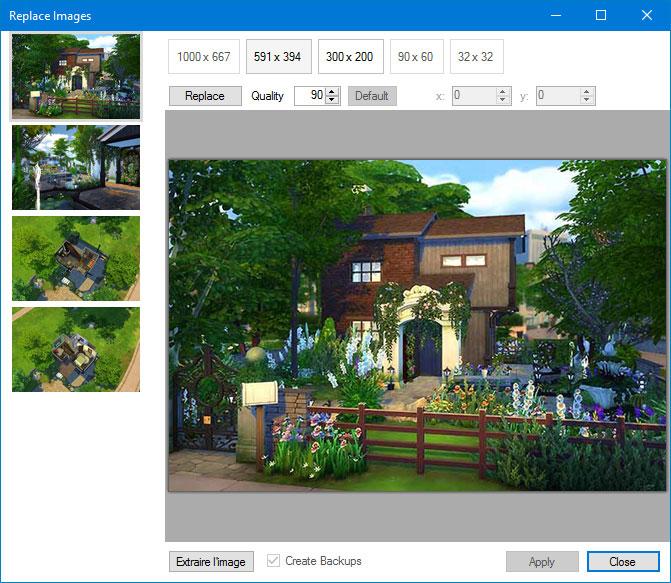
The last step is to share your creation on The Sims 4 Gallery, and that’s all ! Enjoy !

For more information and to download a lot of amazing creations :
UniverSims Downloads Gallery (lots of wonderful things done by our great creators) : HERE
We really want to thank Fezet, AngeRouge and Sirhc59 for testing the tool and helping us. That's The Simers Universe (UniverSims, in french !) !
And the most important : Thank You so much, DEEVO ! 










Commentaires recommandés
Rejoindre la conversation
Vous pouvez publier maintenant et vous inscrire plus tard. Si vous avez un compte, connectez-vous maintenant pour publier avec votre compte.